|
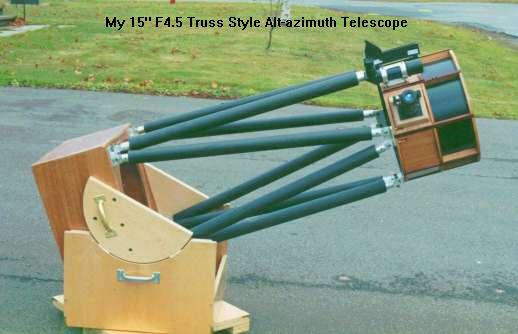
Construction of a truss style alt-azimuth telescope
Rule One-Draw out your design first!
Rule Two-Check your measurements!
Rule Three-Double check your measurements!
Enough rules!
The main considerations in designing your telescope are cost, weight, portability and ease of use.
The majority of the cost of your telescope is going to be the mirrors, anywhere from 50-75% of the total cost. The weight of the individual components will determine the portability of your scope as well as your means of transporting them.
For my scope I picked the 15-16" range as the largest that I could move and assemble by myself. It was also the largest that could easily fit in my vehicle. The general direction of telescope design lately is the truss tube alt-azimuth telescope. It is relatively light-weight, easy to build and easy to assemble and use. This is the direction that I took.
After determining the size of the mirror I wanted I had to settle on an f-ratio, my main consideration here was ease of use. By doing a few CAD drawing with different f-ratios, I picked an f4.5 which would put the eyepiece at my eye height so I would not have to use a ladder or stool with the telescope pointed at the zenith.
With the mirror selected and ordered (or you can grind it yourself), a 15" f4.5 full thickness (2.1") and a 3.1 diagonal. Next you will need a secondary holder and spider, a mirror cell and a focuser. There are several excellent secondary assemblies available commercially at reasonable prices. The mirror cell can be built or bought, depending on your resources, the same for the focuser. I bought the secondary assembly and the
focuser, but made my own mirror cell
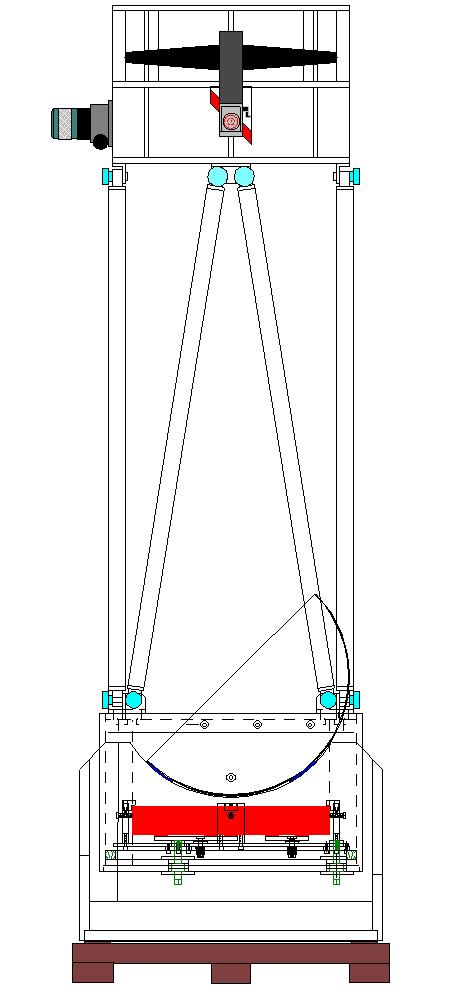
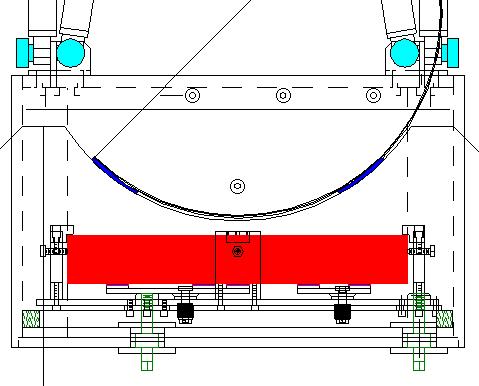
I spent about 2 months at the computer with a CAD program designing the various parts of the telescope, starting with the mirror cell. Next I designed the mirror box and the mounts which attach to the top of the box to hold the struts which will connect the mirror box to the secondary cage .
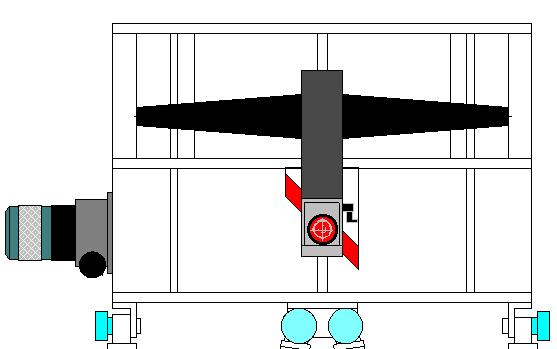
With the lower section of the telescope design settled I turned to the topcage. First you need to determine the positions of the focuser and the secondary mirror and it's holder. You will also want to extend the top of the cage to act as a light/dew shield, it length is up to the individual. I choose 12" as a good compromise, and you can always add a removable section to the front if required.
Next with the top cage designed I used a computer program called Newt to determine the optimal focal point for the positioning of the focuser and the eyepieces. With this data you can calculate the length of the struts.
For this you will need 1-focal length of mirror
2 -distance from top of mirror to top of mirror box
3 -distance from centre of top cage to focal plane at focuser
4 -distance from centre of focuser to bottom of top cage
5 -distances from strut mounting points to the top of the
-mirror box and bottom of top cage
Calculate 1 -(2+3+4) = the separation between the top cage and mirror box. To get the length of the struts you need to do a little trigonometry, or like myself just draw it out on the computer and let it do the work. Just remember to take into account the distance to the mounting points (5). With all this done you can design your struts and order your materials.
MATERIALS- There are dozens of materials that you can make your telescope out of , but for most of us it will be some form of plywood for the main components and aluminium tubing for the struts. While investigating the various plywoods available from my local lumber store I came across a very lightweight marine ply that appears to use a balsa core, with a mahogany veneer facing it looks very nice and take a finish very well.
Continued on next page
|
|